Sending emails with Node.js, Gmail, and IFTTT
2017-09-01
I recently had to set up an email confirmation system for the Atlas of Design in preparation for the next call for participation. The submissions platform is written in Node.js using Express and uses AWS for the data storage and map uploads. The last bit of the puzzle was just a simple email to send folks after they submitted their map. This proved a bit harder than anticipated.
Hard times with Nodemailer
First, email isn’t easy. I don’t pretend to know much about it. The first and most popular result from searching “send email with Node.js” on Google pointed me to Nodemailer. At first, it worked as I expected but over time the security warnings from Gmail kept blocking my application from sending email on behalf of Gmail. I tried all of the “turn on insecure apps mode” and “disabling captcha” to no avail. I needed something much, much simpler than Nodemailer. Just some text in someone’s inbox!
Third-party webhooks
Then I learned services such as Zapier and IFTTT have webhooks. These webhooks are URLs that you send POST requests to with a custom request body, and these services allow you parse that body and take further action. For example, you can trigger events with certain emails and create new entries in a Google Doc, or when you receive a text message you can create an entry in a DynamoDB table. Trigger here, do something there.
Creating the IFTTT webhook
Setting up the webhook in IFTTT (If this, then that) was fairly simple. It doesn’t allow you to get as detailed as Zapier, but they don’t enforce any limits, which was ideal. IFTTT calls their webhooks “Maker webhooks” and you can see the documentation if you go to ifttt.com/maker_webhooks and click “documentation”. This gives you a custom URL for your account with an example cURL request to test with
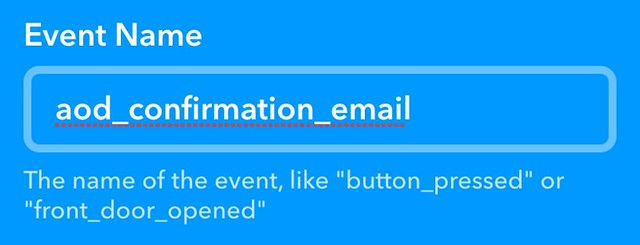
1. Create a new applet (“if this”) and name your event
Search webhook and select it. You’ll want to use the “Receive a web request” option.
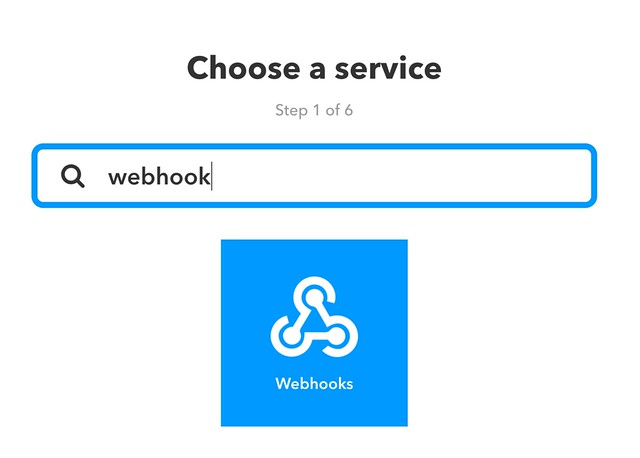
I named the email confirmation event aod_email_confirmation. This is used in your account’s custom webhook URL by replacing the {event} with your name.
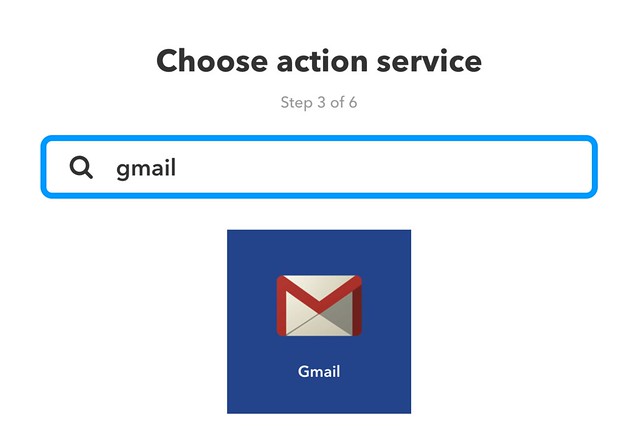
2. Choose an action service (“then that”)
We want to use Gmail to send our emails. Sending email with respectable servers like Gmail increases the chance of your spoofed email confirmations not being caught by spam. IFTTT requires you to give it access to your Gmail so it can send email legitimately. I’m okay with this, because handling email is hard.
3. Enter email details
This is where we start working with the custom data we’ll send later in the POST request. IFTTT only grants you access to a few customer parameters so use them wisely. They are named value1, value2, and value3. We only had three custom data fields to send, so this worked great (Note: Zapier allows you to create custom body parameters). We prepared our application (later step) to use the values like so:
value1: email addressvalue2: namevalue3: map title
Assuming the above, you can fill in the fields with these variables. For example, the “to” email field was set to `` and our email body looks like this:
Hi ,<br>
<br>
Your map "" has been submitted successfully
to the Atlas of Design. Please send us an email if
you have any questions.<br>
<br>
Warmly,<br>
The Atlas of Design team
Save this and enable the applet. Now it’s ready to take requests at your custom URL!
4. Set up your service to send a POST request
Since we’re using Node.js we used request to send our posts. The URL (which you can find by clicking “documentation” on this page) will look like this:
https://maker.ifttt.com/trigger/{event}/with/key/{your_key}
And you’ll want to replace {event} with the name you created in step 1, plus replace {your_key} with the one provided in the documentation page when you’re logged in.
Here’s the script for the aod_email_confirmation webhook:
var webhook = 'https://maker.ifttt.com/trigger/aod_email_confirmation/with/key/{key}';

var body = {
  value1: item.email,
  value2: item.name,
  value3: item.title
};

request.post(webhook, {
  json: body
}, function(err, res) {
  if (err) return callback(err);
  return callback();
});
Now your service can send requests to this URL and IFTTT handles all of the email sending for you. IFTTT has many crazier triggers and events than these, I suggest checking them out!